


In today’s tutorial, we’ll dive into the process of incorporating the Monaco Editor, a powerful browser-based code editor made famous by Visual Studio Code, into a Flutter web application. This integration allows developers to provide their users with a rich coding environment, supporting multiple languages and robust editing features. We’ll cover everything from setup to integration, and I’ll share the complete code needed to get the Monaco Editor up and running in your Flutter project.
The Monaco Editor offers a slew of features that can enhance any web-based IDE or coding platform, including syntax highlighting, code completion, and theme customization. Despite its advantages, integrating the Monaco Editor into a Flutter web application isn’t straightforward due to the lack of direct documentation. This tutorial aims to fill that gap, guiding you through each step with detailed explanations and code snippets.
Setting Up Your Flutter Web Project
Before we integrate the Monaco Editor, ensure your environment is set up for Flutter web development. If you’re new to Flutter or haven’t set up a Flutter web project before, follow the official Flutter documentation to get started. Once your Flutter web environment is ready, create a new project:
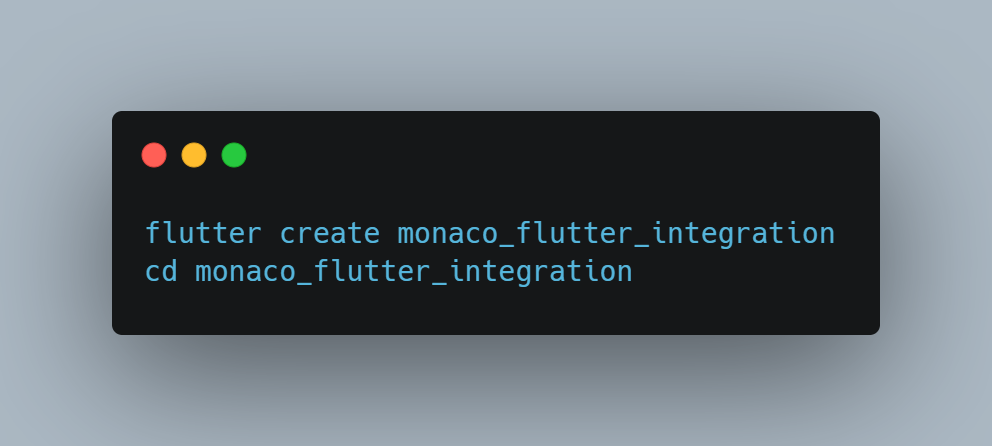
Ensure your project runs correctly in the browser by executing flutter run -d chrome.
Creating the Monaco Editor Widget
The heart of our integration lies in creating a custom Flutter widget that houses the Monaco Editor within an IFrameElement. This approach allows us to embed the editor as part of our Flutter application seamlessly.
File: monaco_editor_widget.dart
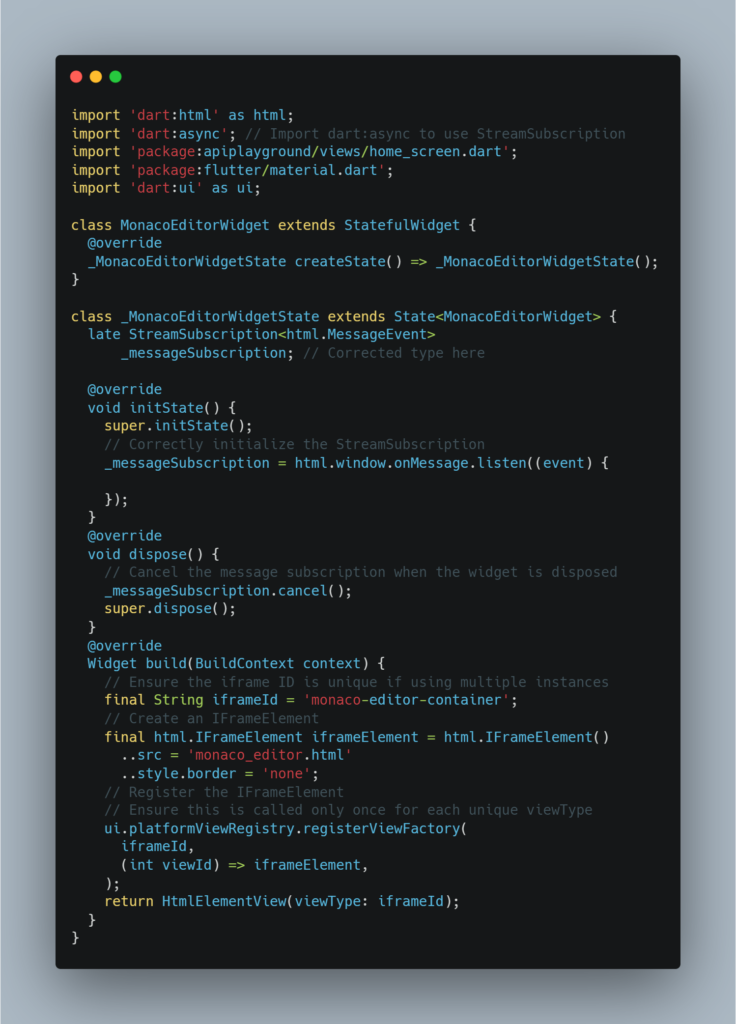
Start by creating a new Dart file named monaco_editor_widget.dart in your project. This file will contain a StatefulWidget class, MonacoEditorWidget, responsible for initializing and displaying the Monaco Editor iframe. Key points to note in the implementation:
- We use
dart:htmlto interact with the iframe anddart:jsfor JavaScript interop. - The
initStatemethod sets up a listener for messages from the iframe, facilitating communication between the Dart code and the embedded JavaScript code. - The
buildmethod dynamically creates an iframe that loadsmonaco_editor.html, a separate HTML file where we’ll initialize the Monaco Editor.
Ensure you handle the iframe registration correctly to avoid issues with multiple instances.
File: monaco_editor.html
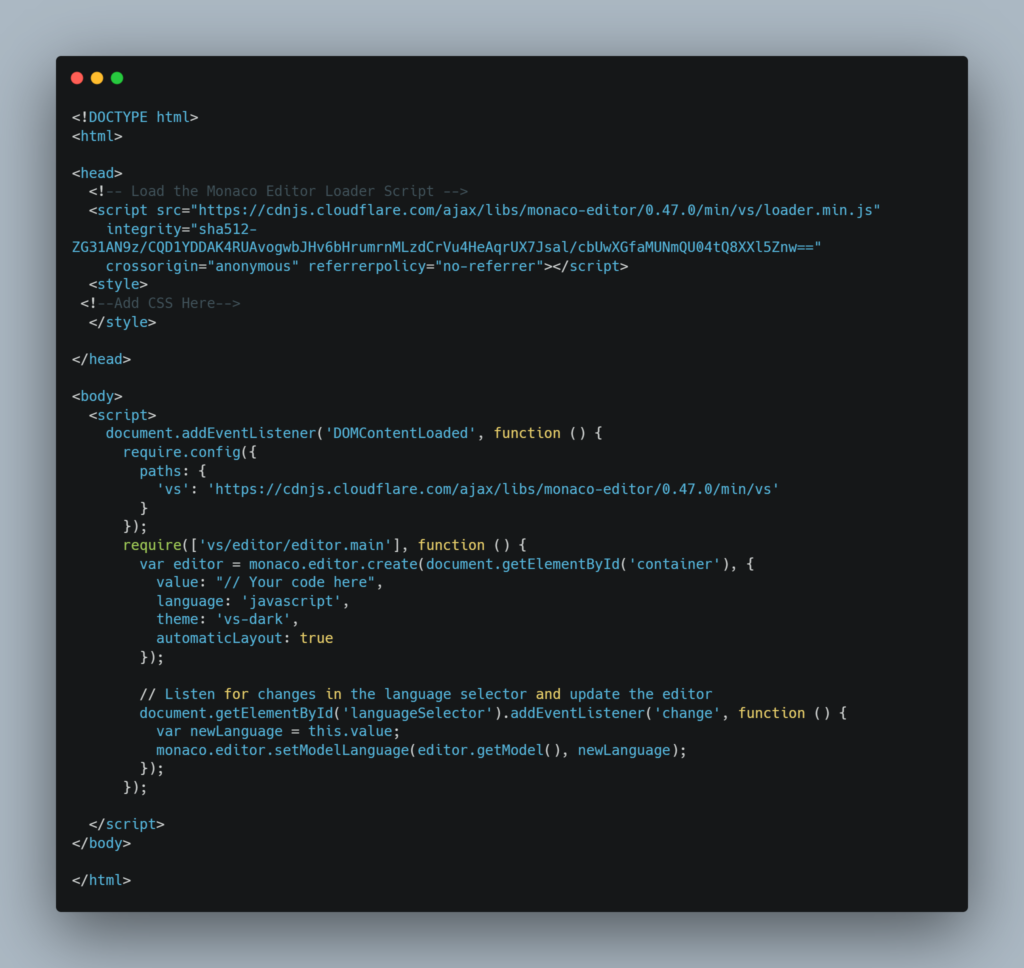
Alongside the Dart widget, you’ll need to create an HTML file named monaco_editor.html in your web folder. This file is crucial as it loads and initializes the Monaco Editor. Include the Monaco Editor’s loader script and style the editor to fit your application’s look and feel. The JavaScript code within this file sets up the editor, configures language support, and handles code execution and output.
Handling Code Execution and Editor Events
In the monaco_editor.html file, JavaScript event listeners play a vital role. For instance, integrating a “Exit Editor” button demonstrates how to interact between the iframe and the Flutter app. Clicking this button triggers a function in Dart through the window object, showcasing basic communication between the embedded editor and the surrounding Flutter UI.
Navigating to the Editor
Finally, you’ll want to either load the Code Editor up directly in your main.dart file, or alternatively, navigate to it with a simple button:

Conclusion and Next Steps
Integrating the Monaco Editor into a Flutter web application opens the door to creating powerful web-based IDEs and code editors. While the setup requires careful attention to detail, the end result is a seamless and responsive code editing experience within your Flutter app.
As next steps, consider exploring additional Monaco Editor configurations, such as theme customization, extended language support, and integrating other web technologies to enhance your application further. With the foundation laid out in this tutorial, you’re well-equipped to take your Flutter web projects to the next level.
Wrapping Up
This tutorial provided a step-by-step guide to integrating the Monaco Editor into a Flutter web application. Through detailed explanations and comprehensive code snippets, you now have the knowledge to embed this powerful code editor into your projects, enhancing your web applications with rich coding features. Happy coding!

